
Install the Android app
This page shows how to install the Musonic app on an Android phone, from the first tap to the first launch. It is written for people who have never installed an app outside the Play Store: follow the bold sentences and the pictures.
What you need
- An Android phone with Android 7.0 or newer, and a 64-bit processor (almost every phone sold since 2017, see Which phones).
- An internet connection.
- The address of a music server and an account on it. If someone runs the server for you, ask them for both.
Install, step by step
Section titled “Install, step by step”The pictures were taken on a Samsung Galaxy A52 with Android 14 and Chrome, and the labels quoted below are the ones it shows. The wording differs a little from one phone brand to another (a Pixel, for example, says “Allow from this source” instead of “Allow permission”), but the steps are the same.
-
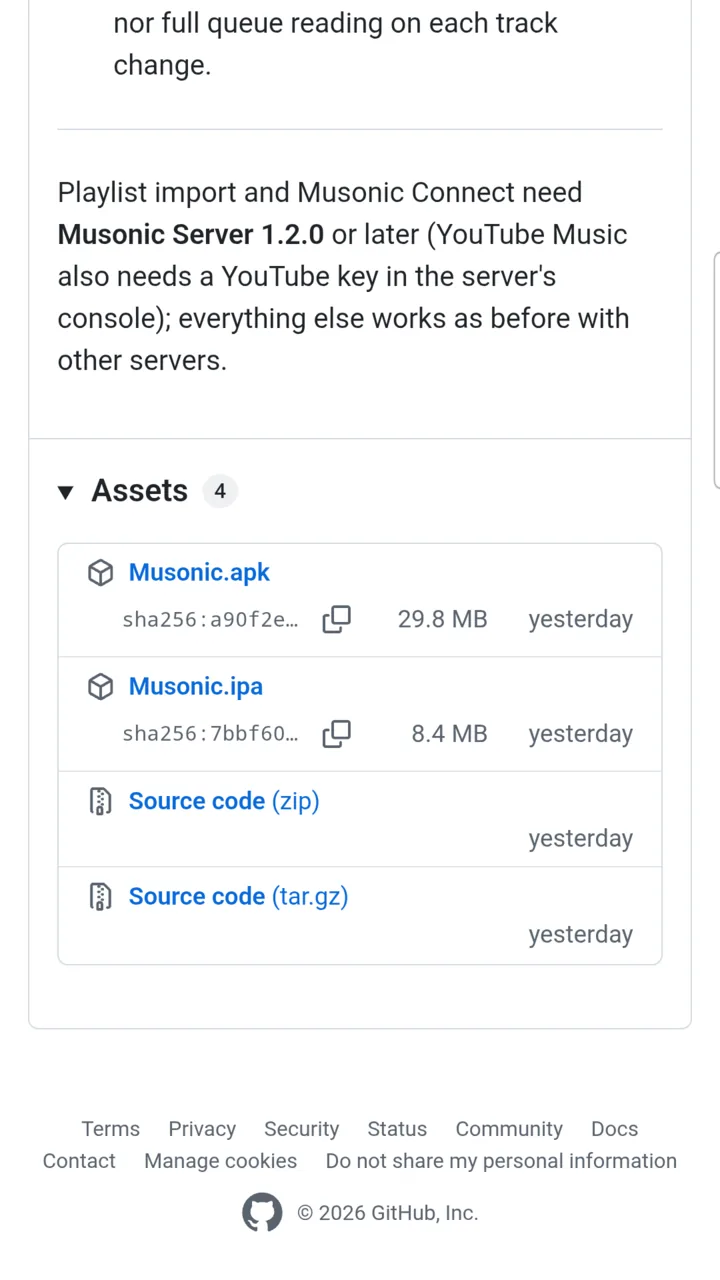
On your phone, open this link in Chrome: Musonic.apk.
It always downloads the latest version. You can also open the release page on GitHub and tap Musonic.apk under Assets: it is the first file of the list, about 30 MB. It is the only file you need: ignore the others (Source code, and Musonic.ipa on older releases, for the iOS app that no longer exists).
-
Chrome says “File might be harmful”: tap “Download anyway”.
The window asks: “Do you want to download ‘Musonic.apk’ (31.24 MB) from release-assets.githubusercontent.com anyway?” Chrome says this for every app file downloaded from a website;
release-assets.githubusercontent.comis where GitHub stores the files of its releases. Musonic.apk is the file published by the project, so you can go on.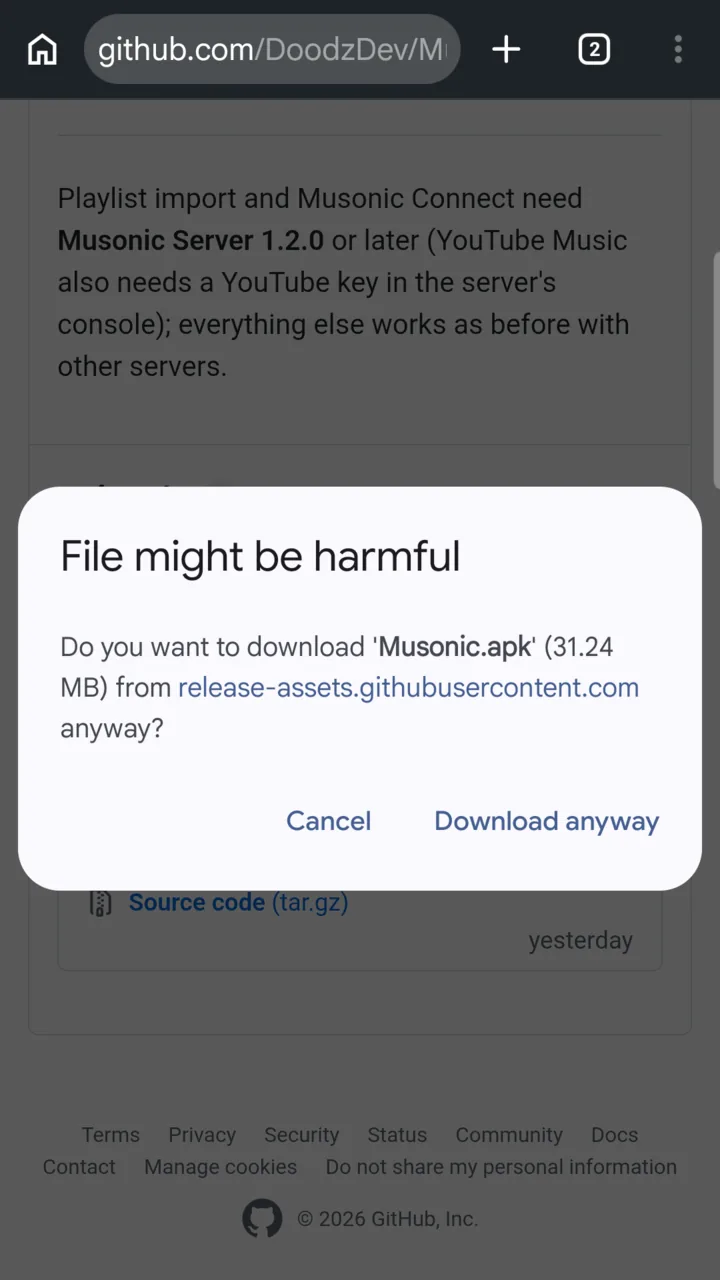
-
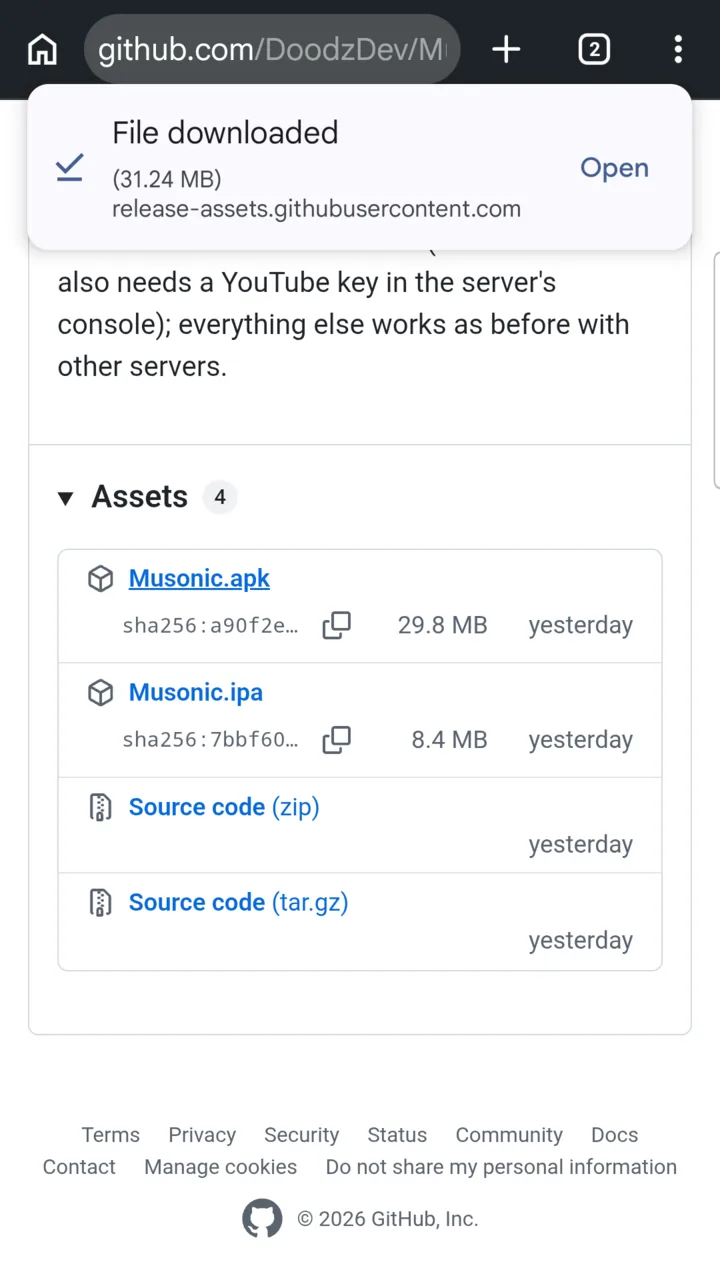
When “File downloaded” shows under the address bar, tap “Open”.
If you missed it, tap Chrome’s ⋮ menu at the top right, then Downloads, and tap Musonic.apk.
-
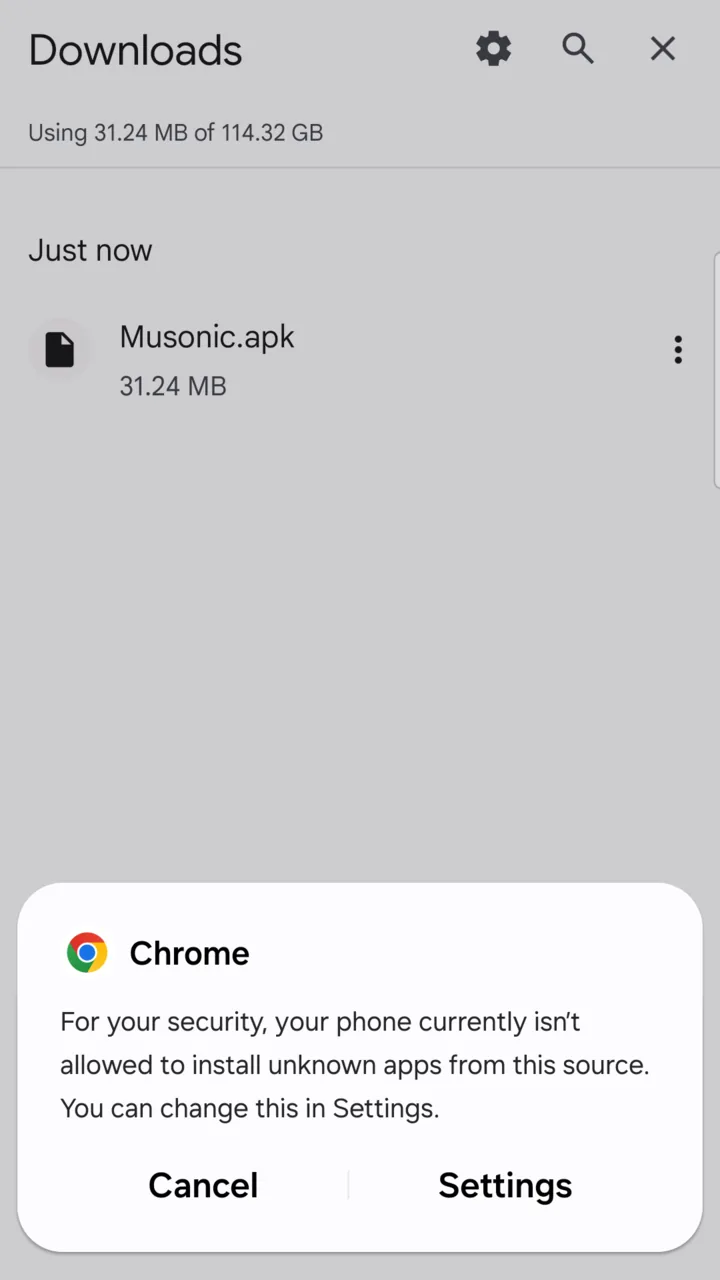
Android says it cannot install unknown apps from this source yet: tap “Settings”.
The message reads: “For your security, your phone currently isn’t allowed to install unknown apps from this source. You can change this in Settings.” Android asks this only the first time you install an app from Chrome.
-
On the “Install unknown apps” page, turn on “Allow permission” for Chrome.
Under the switch, Android warns that installing apps from this source may put your phone and data at risk: this is its usual warning. This allows Chrome to install apps. You can turn it off again once Musonic is installed (see After installing).
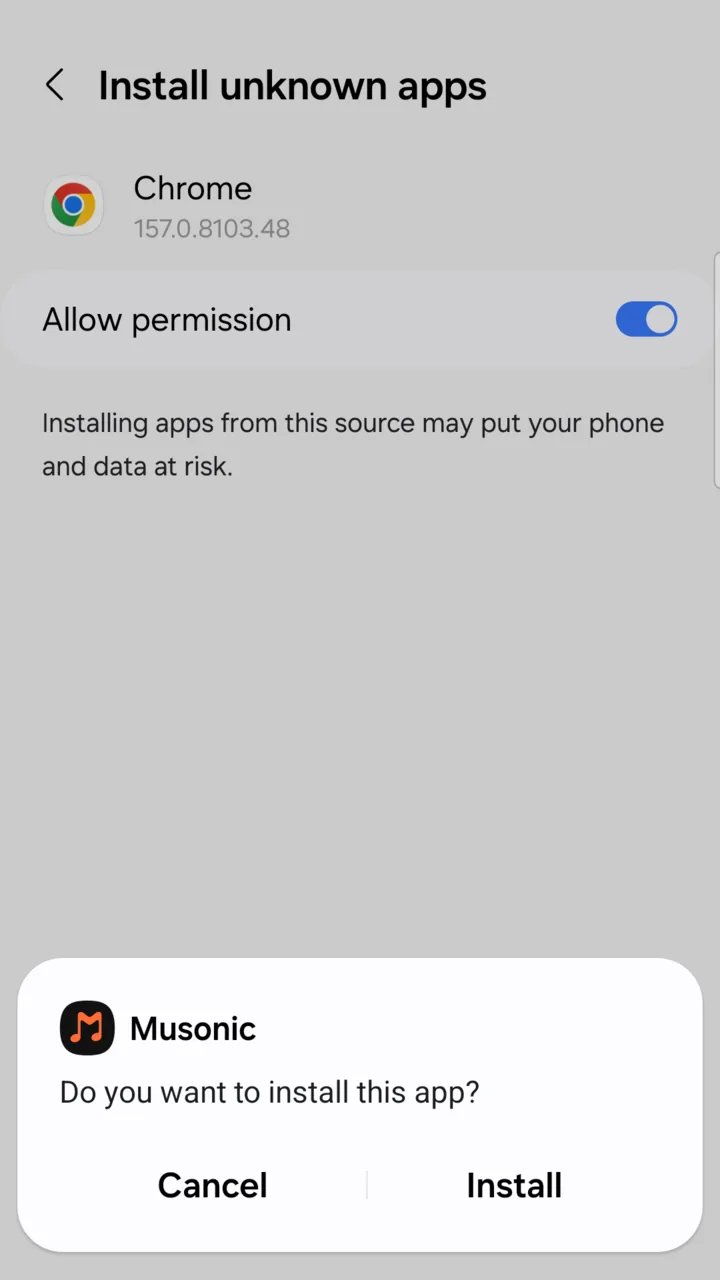
-
Tap “Install”.
The window “Do you want to install this app?” shows right over the settings page as soon as the switch is on. If it does not, go back with the back gesture or the back button.
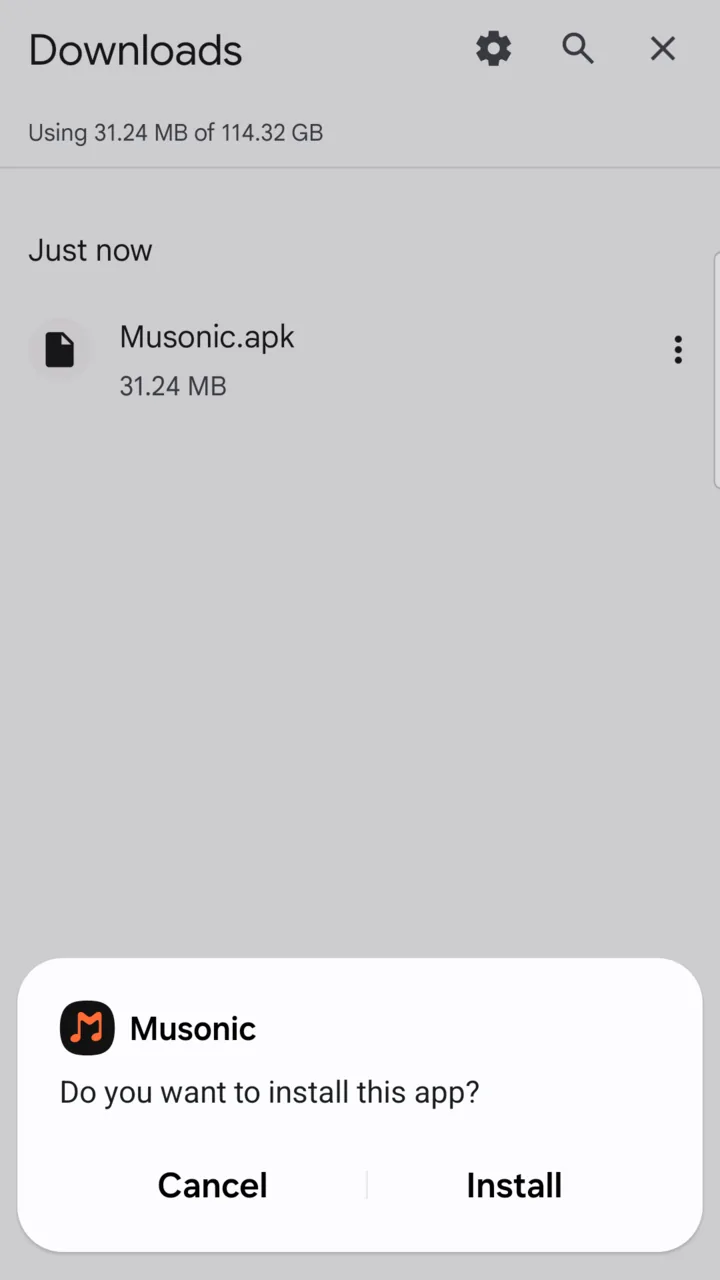
-
Wait a few seconds while Android shows “Installing…”.
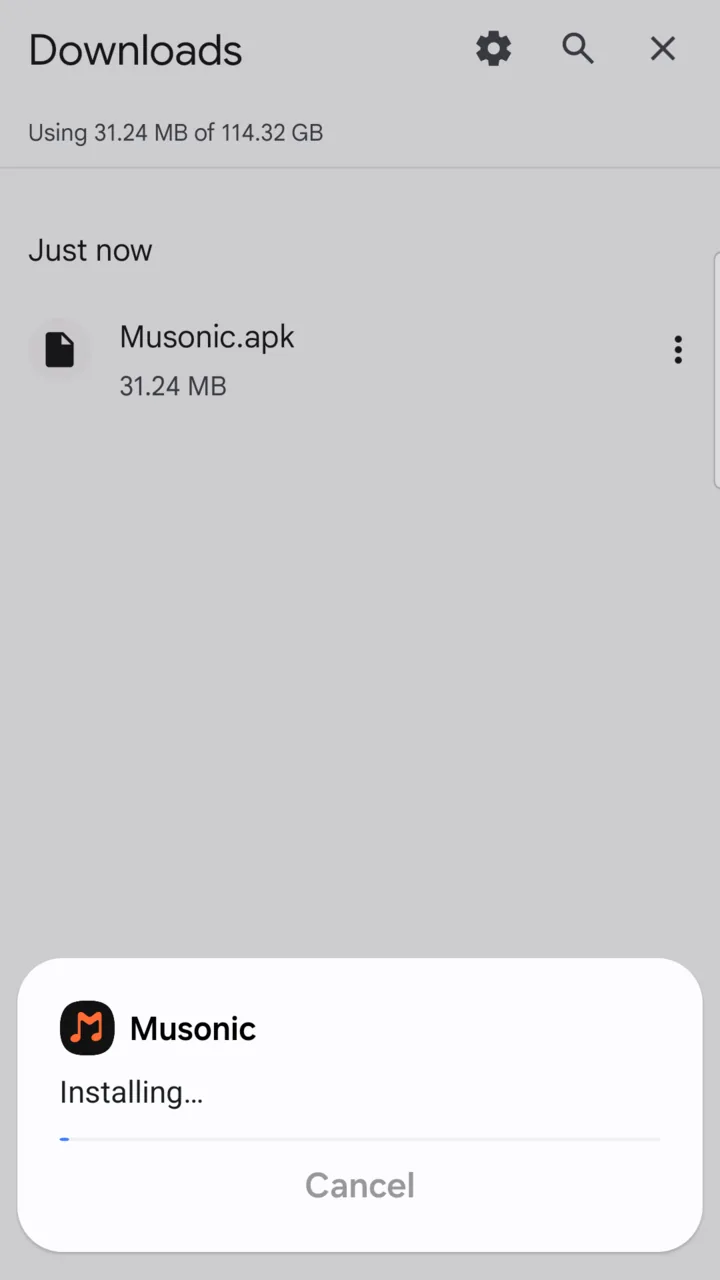
-
If a Google Play Protect window appears, tap “More details”, then “Install anyway”.
Play Protect checks apps that do not come from the Play Store. It may also offer to send the app for a scan: you can accept or decline, it does not change the install. Most of the time no window shows: go to the next step.
-
When Android says “App installed.”, tap “Open”.
Musonic is installed. Its icon is now with your other apps.
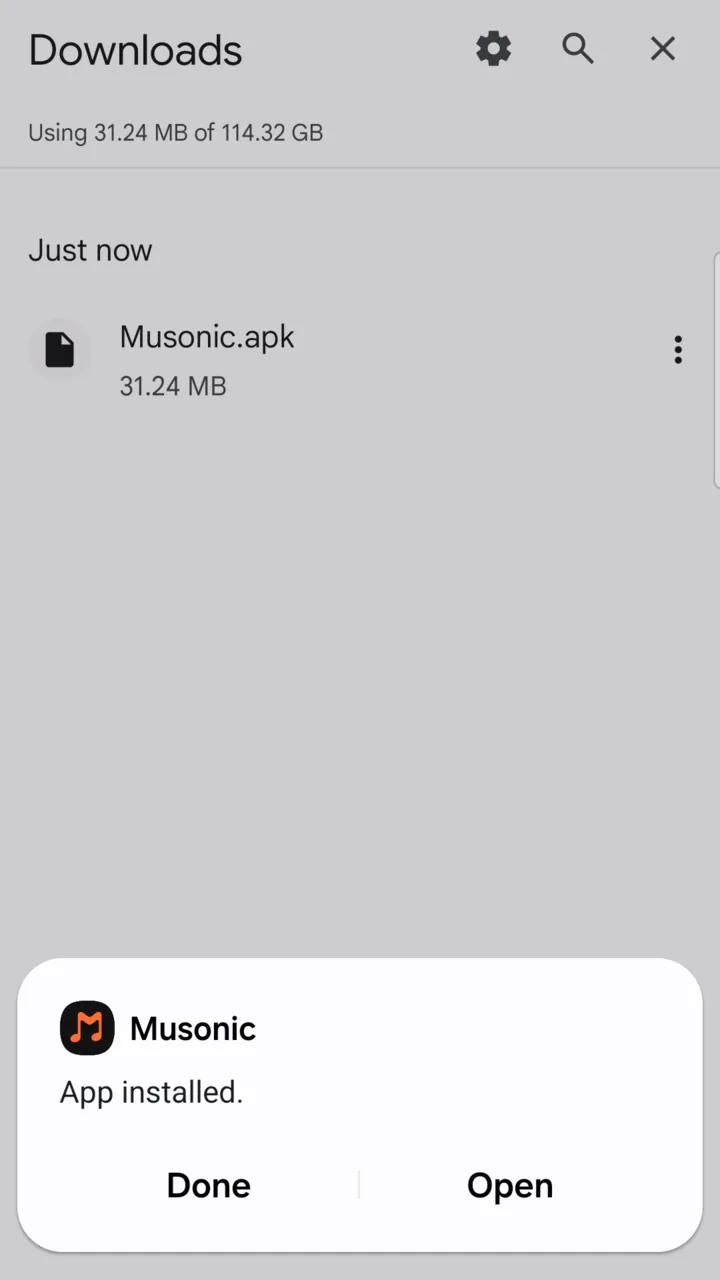
-
Sign in to your server.
Musonic opens on its sign-in screen, “Connect your Subsonic server”: the Server URL field already starts with
https://. Enter the server address, your username and your password, then tap Connect. The next page explains each field: Sign in to a server.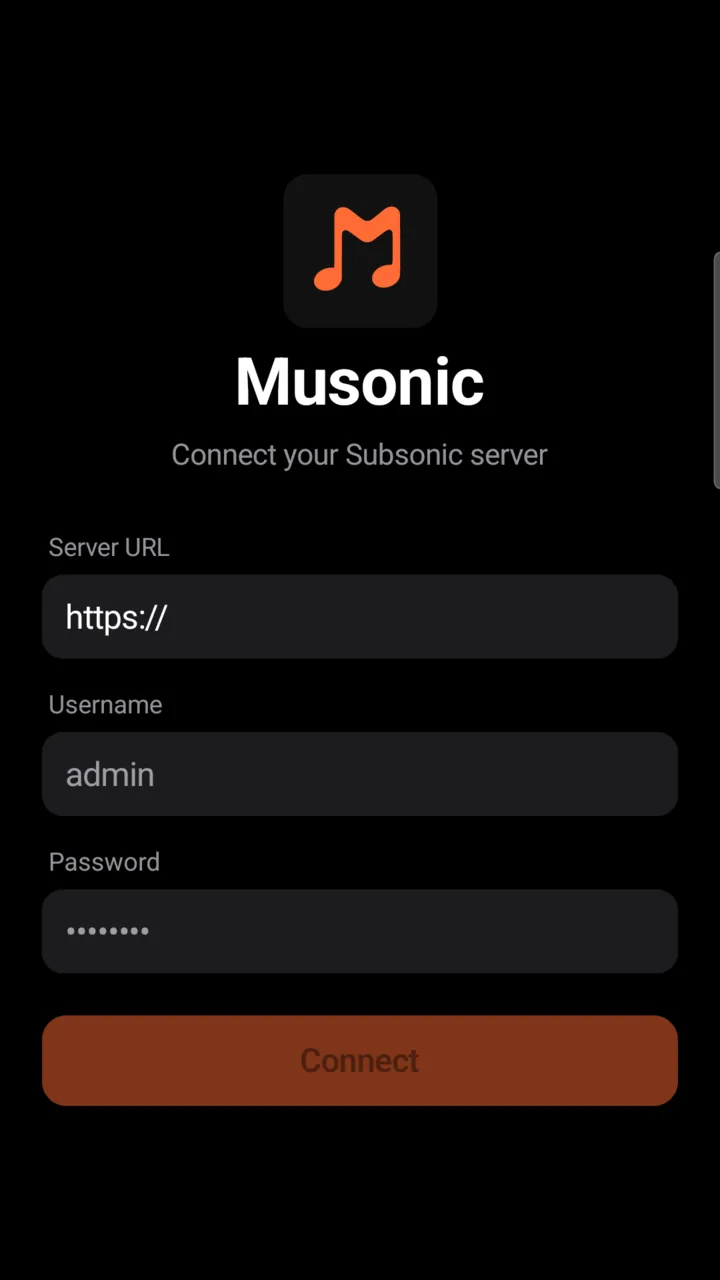
After installing
Section titled “After installing”You can now take the permission back from Chrome: Settings → Apps → Chrome → Install unknown apps (the switch named Allow permission, or Allow from this source on other phones). Musonic keeps working. You will need to turn it on again for the next update, Android asks you the same way as in step 4.
Which phones
Section titled “Which phones”| Android version | 7.0 or newer (Android API level 24) |
| Processor | 64-bit ARM only (arm64-v8a) |
| Play Store, Google account | Not needed |
The app is built only for 64-bit ARM processors, which covers nearly every phone and tablet made in the last years. It does not run on old 32-bit phones, nor on Android devices with an Intel or AMD processor (some TV boxes, emulators on a computer). On such a device, or on Android older than 7.0, Android refuses the file at step 6 or 7 with a message such as “App not installed”. There is nothing to fix on your side: Musonic cannot run there. You can use the web player in the phone’s browser instead.
Updates
Section titled “Updates”Musonic does not update through the Play Store. The app tells you itself when a new version is out.
-
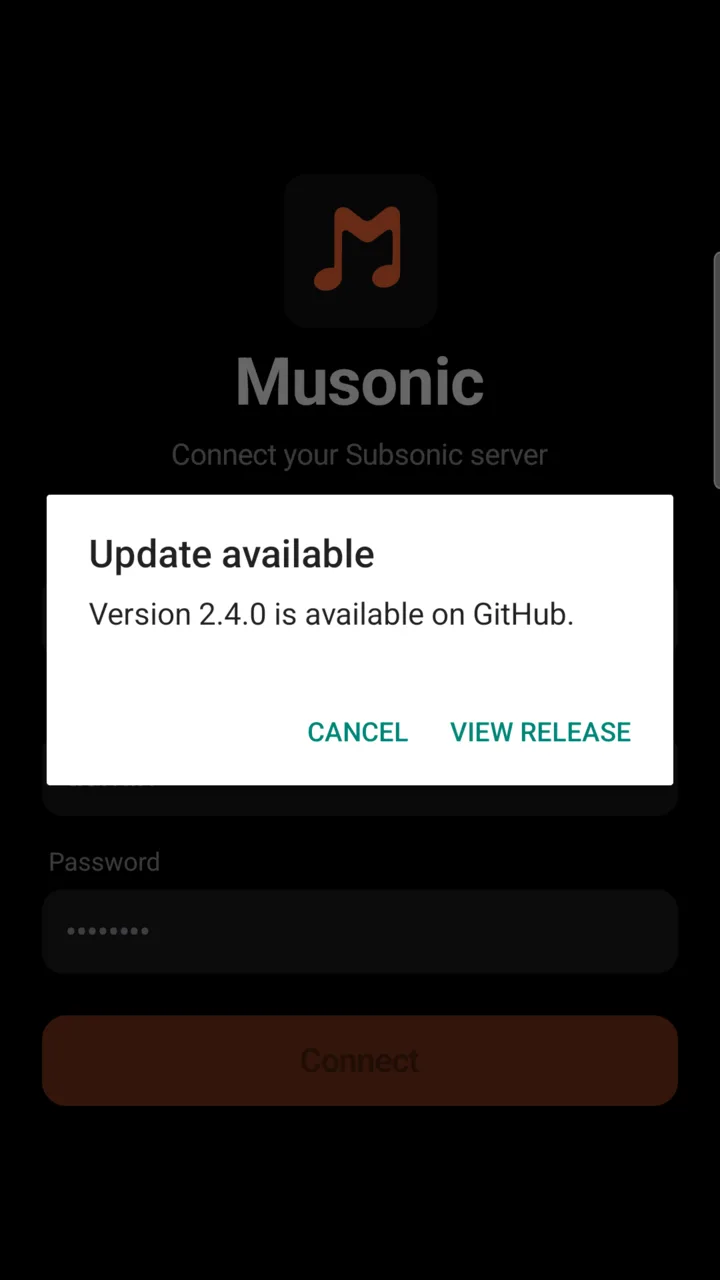
When the “Update available” window shows, tap “View release”.
About three seconds after you open Musonic, the app checks GitHub for a newer version of the Android app. If there is one, it says “Version … is available on GitHub.”, with the number of the new version. Cancel closes the window, it will show again at the next launch.
-
On the release page, tap “Musonic.apk” under “Assets”.
The page of that version opens in your browser. Its text lists what changed.
-
Download it and open it, as in steps 2 and 3 above.
-
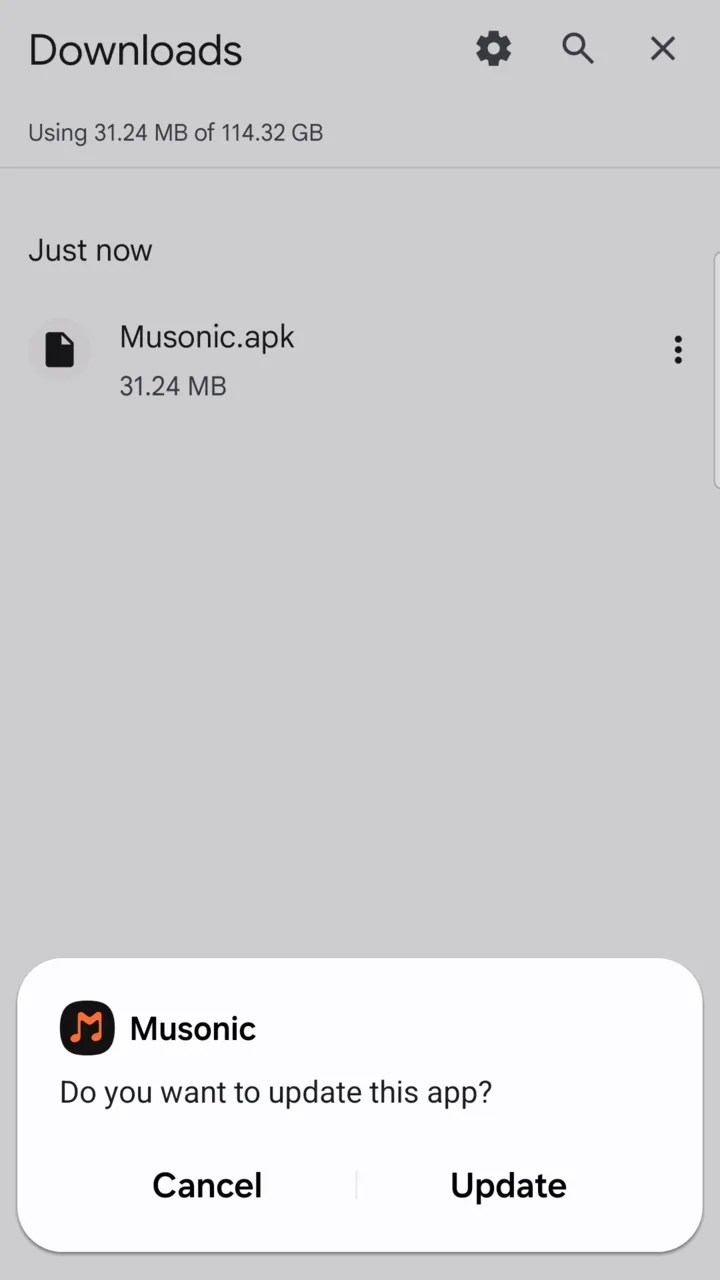
Tap “Update”.
Android sees that Musonic is already installed and offers to update it.
-
Tap “Open”.
Check by hand. Tap the round button with your initial, at the top left of the Home, Search and Library screens (next to the Settings gear), then About, then Check for updates. The app says either “Update available”, or “You’re up to date” with your version and the latest one online. If the phone has no connection, it says “Couldn’t check. Check your connection.”
What the check sends. One request to GitHub’s public list of the project’s releases, with nothing about you or your server. It only looks at Android app versions (tags mobile-v…): a new version of the web player or of the server never triggers the window. Drafts and test versions are skipped.
“App not installed” when updating. Android refuses an update when the installed app was signed by someone else, for example a version you built yourself. In that case only, uninstall it first (and lose its data), then install the version from GitHub.
Uninstall
Section titled “Uninstall”-
Log out first.
Tap the round button with your initial, at the top left (next to the Settings gear), then Log out, and confirm. On Musonic Server, this also deletes the key of this phone on the server, so it disappears from your devices in the console.
-
Touch and hold the Musonic icon, then tap “Uninstall”.
You can also go to Settings → Apps → Musonic → Uninstall.
-
Confirm.
Uninstalling erases everything Musonic stored on the phone: downloaded songs, settings and the account. Nothing changes on the server: your playlists, likes and history are still there when you sign in again on any device.
From a computer with adb
Section titled “From a computer with adb”For advanced users who already use Android’s debugging tools.
Turn on USB debugging in the phone’s developer options, connect the phone, then:
curl -LO https://github.com/DoodzDev/Musonic/releases/latest/download/Musonic.apkadb install -r Musonic.apk-r replaces the installed app and keeps its data: use the same command for every update.
adb uninstall com.musoniccom.musonic is the app’s package name. This erases its data, as uninstalling from the phone does.
Next steps
Section titled “Next steps”- Sign in to a server: the sign-in screen, invitation links and error messages.
- Listen offline: downloads, streaming quality and data use.
- Musonic in the car: set up Android Auto.